<style>
details {
margin-top: 0.5em;
margin-bottom: 0.5em;
}
summary {
//font-weight: bolder;
}
summary:hover {
text-decoration: underline;
}
blockquote {
font-size: 16px;
}
h3{border-bottom: 2px solid black;}
section {
padding: 0em 1em;
padding-bottom: 1em;
padding-top: 1em;
border-radius: 4px;
background-color: #f7f7f7;
border: 1px solid #ccc;
}
.todo {
color: #ff00ff;
border: 2px dashed #ff00ff;
padding: 0em 1em;
border-radius: 5px;
margin-top: 1em;
margin-bottom: 1em;
//display: none; // UNCOMMENT TO HIDE TODOs
}
</style>
**[« Back to the main CS 300 website](https://csci0300.github.io/)**
# Project 1: Snake
**Key deadlines**
- **Part 1A checkin**: due **Friday, January 30th**
- **Parts 1 and 2**: due **Friday, February 6th at 8PM**
- **All parts (1-3)**: due **Friday, February 13th at 8PM**
---
# Introduction
Welcome to the first project of CS 300! We're excited that you're here! :smiley:
In this project, you will develop a version of [Snake](https://en.wikipedia.org/wiki/Snake_(video_game_genre)), a famous early computer game widely cloned and reproduced. (Fun fact: [Snake in QBASIC](https://en.wikipedia.org/wiki/Nibbles_(video_game)) was the first computer game CS300's creator, Malte, played as a child, and Snake was also on his first mobile phone, a [Nokia 3310](https://en.wikipedia.org/wiki/Nokia_3310).)
Since we're writing the Snake game in the C, this assignment requires you to work directly with memory and data representations. In the first and second portions of the project, you will set up a basic playable version of the game with customizable levels. In the third part, you will bring your implementation closer to the original snake game by adding a growing snake (using your own linked list data structure), and explore different character representations that allow for player names from different cultures by supporting their alphabets.
:::warning
**⚠️ Warning**: **This assignment is not trivial, so it's important to get started early!** It's very doable (even the tough parts), but you'll want to start early to have enough time to debug your code. **We recommend starting after Lecture 2 (on January 27).**
:::
## Learning Objectives
In this assignment, you will:
- Practice writing code in the C programming language.
- Understand how data is laid out in memory.
- Learn how to work with pointers.
- Become familiar with C strings, bitwise operations, and dynamic memory allocation (`malloc` and `free`).
- Understand the difference between ASCII and Unicode character representations.
## Assignment Installation
If you have completed [Lab 0](https://csci0300.github.io/assign/labs/lab0.html), you will already have created a private GitHub repository for your project work under the `csci0300` organization.
:::warning
⚠️ **If you have not completed [Lab 0](https://csci0300.github.io/assign/labs/lab0.html), you should do it now. You will need to use the container environment from Lab 0 to work on this assignment.**
:::
To get started on this project, you will need to pull some additional stencil code into your projects repo, as follows:
1. Open a terminal in your container environment and `cd` into the directory you setup as your project repo from Lab 0 (eg. `cd projects`).
2. Run the following command to pull the latest code from the `handout` remote:
```
cs300-user@9899143429a2:~/projects$ git pull handout main
```
If this reports an error, run:
```
git remote add handout git@github.com:csci0300/cs300-s26-projects.git
```
followed by:
```
git pull
git pull handout main
```
This will merge our Project 1 stencil code with your repository.
Once you have a local working copy of the repository that is up to date with our stencils, you are good to proceed. You'll be doing all your work for this project inside the `snake` directory in the working copy of your project's repository.
<details>
<summary><b>VSCode Setup</b></summary>
<br />
1. Open VSCode and attach it to your container [(see instructions here)](https://csci0300.github.io/assign/labs/lab0.html#Attaching-VSCode-to-your-container)
2. If your IntelliSense (command clicking to "find definition") is not working, follow these [directions](https://csci0300.github.io/assign/labs/lab0.html#Attaching-VSCode-to-your-container). It is <u>highly recommended</u> to set this up as it will help immensely with debugging later down the line.
</details>
# Overview (and how to read the handout)
Since this is our first project learning C, we've divided this assignment up into parts to help you tackle the project in a manageable way. We've also set up the stencil code so that each part introduces you to new C concepts, in roughly the order that we talk about them in lecture. Here's a brief overview of each part, and the concepts they introduce:
- 🏁 [**Part 1A: Snake Data and Movement**](#Part-1A-Snake-Movement): you'll focus on navigating our stencil environment and defining key metadata to represent your snake, which will give you practice with declaring variables and working with pointers
- 🐍 [**Part 1B: Updating the board**](#Part-1B-Updating-and-Running-the-Game): you'll write the core logic for moving the snake on the board. In doing so, you'll work with a new C concept that extends from lecture: bitwise operators. At this stage, the snake can't grow yet--it's just a baby snake of size 1!
- 🎮 [**Part 2: Board decompression**](#Part-2-Board-Decompression-game_setupc): you'll write a function that parses a *compressed board string*, a compact representation for specifying the game board. This will let you implement and play fun levels! In doing so, you'll practice parsing strings and working with C library functions.
- 🐍🔗🐍 [**Part 3: Growing snake**](#Part-3A-Growing-Snake): you'll make your snake grow when it eats food by using a linked list to represent the snake. You'll build and test code for a linked list in Lab 2, then add that code to this project.
- 📝 [**Part 4: Game over display + reflect on Unicode**](#Part-3B-Game-Over-display--learning-about-Unicode): you'll implement a "game over" display when the player loses, which shows the user's name and score. In doing so, we'll learn about the complexities of displaying data in different character sets (i.e., the Unicode standard) to support multiple languages. You'll also reflect on this part and discuss it with a partner.
Again, this may sound like a lot at first (and, indeed, this handout looks long...), but don't worry! We've provided a lot of structure to help you get started and think about each part, and resources to help you debug.
:::success
### :eyes: How to read this handout
As you continue reading and get started, here are some things to keep in mind:
1. We recommend following this handout from the beginning and working on the tasks in order. The tasks are designed to build on each other in sequence, following the order of concepts in lecture.
2. Some tasks introduce **"Important background"**: these sections are either a primer about how our stencil works, or a short tutorial about a certain C concept that's important for that task. **When you see one of these, make sure you read it as you work on the task--we promise it will help!**
4. If you get stuck, or aren't sure how to run something, see the [**Testing**](#Testing) and [**Debugging**](#Debugging) sections, which have instructions on how to run the tests and common debugging tips. We'll introduce you to some of these as we go, but **remember to look here when you need it**.
5. If you want more reference material about C, see our **[C language primers](https://csci0300.github.io/c-cpp-primer/)**. This project is designed to gradually introduce you to C concepts, but look here for a general reference!
:::
## Stencil overview
This stencil is divided into a few parts:
- The `src` directory contains all of the C files in the game. The most important ones are:
- `snake.c`: The game starts here! Contains the `main` function and sets up everything else
- `game.c`: The core logic for the game
- `game_setup.c`: Functions for creating the board
- `game.h` and `common.h`: Definitions for data and constants
- The `test` folder contains our test suite, and scripts to run the tests. Do not modify this code.
- `test/traces.json` describes all of our tests and how they work. See the [Testing](#Testing) section for more info!
# Part 1A: Snake Movement
The rules of the Snake game are as follows:
1. The snake moves around a rectangular playing field bordered by walls, and with some optional internal walls.
2. The player uses arrow keys to change the snake's direction.
3. Food appears at random locations on the playing field, and if the snake's head hits the food, the snake eats it. The player's score increases and new food appears elsewhere.
4. When the snake runs into a wall (or into its own body), it dies and the game is over.
5. Some cells may also contain grass, which the snake or food can hide in, causing it to appear a different color.
Your task is to take the stencil -- which starts out doing nothing at all -- and implement a game with these rules. Don't worry, we'll break this down for you!
::::success
**Task:** To get started, compile the stencil code and run it!
<details>
<summary><b>Hints on compiling</b></summary>
<br />
[Make](https://www.gnu.org/software/make/) is a tool that enables us to generate executable files from source code. The Makefile defines rules and behaviors for compilation. You'll learn more about Makefiles in [Lab 1](https://csci0300.github.io/schedule).
Navigate to your project directory and run `make` to create an executable file (called `snake`). You can also run tests with `make` — read through the rest of the handout!
</details>
When you run the code, you should see the program simply print a message then exit:
```shell
$ make
$ ./snake
usage: snake <GROWS: 0|1> [BOARD STRING]
$ ./snake 0
____
Hello / . .\
CS 300 \ ---<
student! \ /
__________/ /
-=:___________/
```
::::
## Getting started: Board and Game Setup
Your first task is to extend the stencil with the necessary code to represent and update the game state in memory. We have already created the local variables you need to store information about the game board (`main` in `snake.c`), and created some the global variables you need to represent the game itself (`common.<c|h>`). Your job will be to add to this to represent the snake as it moves through the board.
Before we do this, we'll provide an overview how we represent the board and game state in the stencil, and why. Then, you will come up with a representation for storing information about the snake.
<section>
### Important background: Board and game data
We know that the game board is a certain size, has a snake, and may contain walls. In addition, the program will support custom user-created levels, which have different boards. We will also need to access and update the snake's position on the board, when the user presses an arrow key.
So, what are some important details about the game board that we need to store? What data do we need to represent the board itself? Think about these questions, and then read the overview below to see how we do this in the stencil.
<details>
<summary><b>Click to read: how we represent the board </b></summary>
<br />
The main variables for the board are defined in the `main` function in `snake.c`:
```c
int main(int argc, char** argv) {
// . . .
// Board data
size_t width; // number of columns in board
size_t height; // number of rows in board
int* cells; // array of integers with data for each board cell
// . . .
}
```
Let's break down how these are defined, which can teach us more about C:
- `width` and `height`: store the dimensions of the board.
- Notice that their type is `size_t`: under the hood, this type is the same as `unsigned long`, but by convention we use the common alias `size_t` to indicate that the value is a "size" of some other kind of data.
- In our game, we define `width` as the number of **columns**, and `height` as the number of **rows**. Your game logic must remain consistent with this!
- `cells` is an array of integers (i.e., `int[]`) representing the actual game board. However, you may notice that we define `cells` as `int*`, not `int[]`! Remember from lecture the duality between pointers and integers: the pointer refers to the start of a region of memory large enough to represent all the cells on the board. From there, we can use array indexing (ie. pointer arithmetic) to access and update the other cells on the board. It's okay if this seems weird at first, but it will become more clear as we continue in lecture, and in the project!
- Remember that cells is defined in the code as a 1D array, even though it appears visually as 2D. As you implement, think about how you can find the index of a particular cell in this 1D format (given that you know the width and height of the board).
Notice that `cells`, `width`, and `height` are **local variables** in the function `main`. This will affect how we use them throughout the project--we'll see how in the next task!
</details>
</section>
<br />
<section>
### Important background: Game state (+ global variables and `extern`)
Beyond just storing the board, we also need to store some metadata about the game itself. Our stencil starts with the following metadata (declared in `common.h`, and defined in `common.c`):
```c
// common.c
int g_game_over; // 1 if game is over, 0 otherwise
int g_score; // game score: 1 point for every food eaten
```
Some notes about these variables, which can teach us some important things about C:
- Take a moment and find these variables in `common.c`: notice they are **global** variables, since they are defined at the top of `common.c`. Normally, a global variable means means you can access these variables from any other function in that file.
- However, in our project, we also want to access globals like `g_game_over` and `g_score` from other files in the project. To make this work, we also need to declare these variables in `common.h` so that other files know about them. We do this with a special C keyword called `extern`, which we haven't seen before:
```c
/* common.h */
// extern definitions for the globals, to match `common.c`!
extern int g_game_over;
extern int g_score;
```
Creating an `extern` definition doesn't make a new variable--instead, its job is to tell any file that includes `common.h` that a variable exists somewhere with this name. Then, when we run `make`, the compiler finds the actual variable named, e.g., `g_game_over` declared in `common.c` and uses it. The key point here is that, **in a multi-file project like Snake, defining a global has two steps**: declaring it in a `.c` file, and making a matching `extern` definition in a header file.
</section>
### Your task: defining the snake
In addition to the metadata for the board and game, we need metadata to keep track of the snake. Consider how you will represent the snake's position and its current direction of movement, so you can then use your representation to update the overall game state.
::::success
**Task:** In `common.h` and `common.c`, declare the global variables you need for your representation of the snake. (What information do you need to keep track of to represent the board?)
:::warning
**Important:** For this part, **you only need to represent the head of the snake (i.e., your snake is always of length 1)**. In Part 3, you will need to implement snake growth.
:::
<details>
<summary><b> Hints! </b></summary>
<br />
- You'll need to keep track of the snake’s position on the board. How can you do so? (Remember that you need to be able to find the snake's cell in the cell array contained in the board.)
- How can you represent the snake's direction of movement? (**Hint**: take a look at the `input_key` enum defined in `common.h`.)
- Why do we tell you to modify both `common.c` and `common.h`? How can you use the `extern` keyword to define global variables in a multi-file project?
</details>
::::
#### Board and Game Initialization
Now that we have our representation of game data defined, we need to initialize all of our data before we can run our game. First, take a look at the function `initialize_default_board` (in `game_setup.c`). **You do not need to modify this function in this project.**
::::info
`enum board_init_status initialize_default_board(int** cells_p, size_t* width, size_t* height)`
<details>
<summary><b>Function Description</b></summary>
<br />
**Purpose:** Initializes the `cells` array to a default board with 10 rows and 20 columns. The snake is initialized at the 3rd row down and 3rd column from the left within the cells array. This default board has a ring of walls around the outermost edge, and a ring of grass inside of that. You do not need to modify this function.
**Arguments:**
* `cells_p` a pointer to the array of board cells
* `width_p` a pointer to the value describing the width of the board
* `height_p` a pointer to the value describing the height of the board
**Output:** `INIT_SUCCESS` (denoting that board initialization was successful)
</details>
::::
This helper function that we've given you initializes the given board variables to a default board, upon which you can implement basic snake motions. This board has no internal walls.
:::info
**What is `enum board_init_status`?**
You may notice that the return value of `initialize_default_board` is a value of type `enum board_init_status`. This type represents possible error codes for errors that could occur during board initialization.
You will need to use this enum when you support loading custom levels in part 2. For now however, we are only initializing the default board, so the return value will always be `INIT_SUCCESS`.
You can find the full description of the `board_init_status` enum in `game_setup.h`.
:::
Now take a look at the function `initialize_game` (also in `game_setup.c`):
:::info
`enum board_init_status initialize_game(int** cells_p, size_t* width_p,
size_t* height_p, snake_t* snake_p,
char* board_rep);`
:::
::::success
**Task:** Your task is to implement `initialize_game`, which should initialize all board data.
Here's a roadmap:
1. Call `initialize_default_board` to initialize `cells_p`, `width_p`, and `height_p`. (You should not touch the `snake_p` parameter until part 3!)
- Notice that `initialize_game` takes in pointers to all of the board variables. This is because these variables are local to `main`. In order to pass them to `initialize_default_board`, you'll need to use pointers:
:::info
<details> <summary>Important info on local variables and passing pointers</summary>
In a naive approach, the function signature of `initialize_default_board` might look like
```c
enum board_init_status
initialize_default_board(int* cells, size_t width, size_t height)
```
The problem with this is that any changes to these parameters are not reflected in the original variables passed into the function. The solution to this is to pass pointers to those values instead.
```c
enum board_init_status
initialize_default_board(int** cells_p, size_t* width_p, size_t* height_p)
```
(The \_p suffix is a convention used in this project to indicate that these variables are pointers to `cells`, `width`, and `height`.)
Pointers hold the addresses of these variables, so if we pass in the address of `cells`, `width`, and `height` to this new version of the function, the addresses will be copied over, not the actual values themselves. Once we dereference these addresses, we recover their original values in memory.
```c
/* inside the initialize_default_board function */
*width_p = 20;
...
```
Then once the function terminates, it doesn't matter that the copies of `cells_p`, `width_p`, and `height_p` are deleted, because we've already made the changes to the values they point to.
</details>
:::
3. Initialize all global variables that you declared in `common.h`, including general game data and the snake data you defined. Depending on how you did this, you may need to use information you obtain by reading `initialize_default_board` to set these values. It's okay to hard-code this information for now; later, you will customize it for custom boards.
4. Set the return value of `initialize_game` to the value returned from `initialize_default_board`.
Notice that `initialize_game` is called in the `main` function in `snake.c` in the stencil. You do not need to add this call yourself.
::::
:::warning
⚠️**CAUTION**: **What you need to know about the Autograder**
The correctness tests call `initialize_game` to check your snake program's functionality, so make sure to initialize your global variables in `initialize_game` and NOT in `main`. Otherwise, your program will run manually but will fail the tests!
:::
### Cleaning Up Resources
Now that we have initialized our game and board data, let's run the program as it currently stands!
:::success
**Task:** Compile your code using `make clean all`, and run the program using the following command:
```shell
$ ./snake 0
```
When you run your program, no board will show up because we haven't written the code to display it on the screen yet. Instead, you should see our friendly Snake with the welcome message, but also something else...

This message is an example of a *sanitizer error*--it may look scary at first, but we'll learn how to break it down over the next few lectures. Sanitizer errors are designed to help us make sure we're using our program memory correctly. If you want to read more about sanitizers now, expand the drop-downs below for additional details regarding the two types of sanitizers you'll be working with for this assignment.
<details><summary><b>Leak Sanitizer</b></summary>
<br />
The leak sanitizer detects *memory leaks* upon the completion of a program. A memory leak occurs when memory allocated during our program is not freed before exiting.
</details>
<details><summary><b>Address Sanitizer</b></summary>
<br />
The address sanitizer detects invalid memory accesses when a program runs. There are several types of invalid memory accesses (which you'll be exploring in detail in a future project), but they can all involve either reading from or writing to memory that was not currently allocated to the program.
Note that by default, the address sanitizer comes packaged with the leak sanitizer, so compiling with `-fsanitize=address` (enabled by default in this project) is sufficient :-).
</details>
Also see our [C primer on debugging](https://csci0300.github.io/assets/c-primer3.html) for more information on sanitizers!
:::
The error you should just have encountered is from the **Leak Sanitizer**. Let's figure out why that is!
Memory is a critical resource that we must clean up when we no longer need it. This is particularly true for _dynamically-allocated memory_ (memory with a manual lifetime), which we'll cover in lecture 5. However, our Snake project needs to use dynamically-allocated memory now, so here's a brief preview! Dynamically-allocated memory doesn't get automatically freed up - we have to manually add code to do this when we are done using a value. If not, a long running program could eventually use all the memory in the computer! The LeakSanitizer looks for dynamically-allocated memory that is still live when your program exists, and warns you about this "leaked" memory. In other words, once our game ends, we need to make sure that we have _freed all the data_ we allocated to play the game! In our case, we seem to be forgetting to free some memory.
Luckily, the sanitizer error gives us a good idea of where to look. Look at the backtrace from the sanitizer error—you should see a call to a function called **`malloc`**. `malloc` dynamically allocates memory, meaning that we as programmers are responsible for freeing that memory with a call to `free`. *The Leak Sanitizer's message says that we have forgotten to free the memory that we had previously allocated through `malloc`!*
:::info
**What to expect**: we will learn more about `malloc` and `free` in lecture 4, so it's okay if the idea of dynamically-allocated memory doesn't make much sense yet. However, at this stage, we just want you to see the idea of allocating memory (`malloc`), and freeing it (with `free`), and to know that memory that is allocated with `malloc` must be freed. You'll implement this now by fixing the error, and then we'll learn more about the concepts in class soon!
:::
:::success
**Task**: To start resolving the sanitizer error, go to the end of the `main` function in `snake.c` and **uncomment the line** that calls `end_game(cells, width, height, &snake)`.
The `end_game` function is responsible for freeing all the resources used up by our program, as well as stopping game. Click on the dropdown for more information on `end_game`.
:::
::::info
`void end_game(int* cells, size_t width, size_t height, snake_t* snake_p)`
<details>
<summary><b>Function Summary</b></summary>
<br />
**Purpose:** Responsible for cleaning up all the memory used by the game and stopping the renderer.
**Arguments:**
* `cells`: the array of board cells
* `width`: the width of the board
* `height`: the height of the board
* `snake_p`: a pointer to the snake struct (not used until part 3!)
</details>
::::
:::success
**Task:** You will now add a call to `free` such that the memory that your program allocated through `malloc` is freed when it calls `end_game`. To do this, you should:
1. Use the backtrace from the Leak Sanitizer to find out where the program calls `malloc`, and where the program stores the pointer it returns.
2. Look at the definition of `end_game` to find out where you need to put a call to `free`. (Does `end_game` call any functions that have access to `cells`?)
3. Insert an appropriate call to `free`! (Note that `free` takes in one argument: the `cells` array (a pointer)).
<details>
<summary><b>Example of using <code>free</code></b></summary>
<br />
<pre><code>int* num = malloc(4); // allocates 4 bytes of memory
free(num); // frees up the 4 bytes
</code></pre>
</details>
After you add your call to `free`, compile and run your program again. You should now no longer see the sanitizer error.
:::
::::warning
Once you have correctly implemented this section, you should not get any Leak Sanitizer errors when running the game until Part 3.
::::
Congrats! You have now ensured that once the game ends, all allocated memory is freed before `main` exits (for now).
### The Game Loop
Let's get some visual output.
:::success
**Task**: Now, at the end of the `main` function in `snake.c`, **uncomment the line** that calls `initialize_window(width, height)`.
The `initialize_window` function is responsible for setting up the game renderer.r
:::
Many computer games are designed around the idea of a core "game loop" that repeats over and over until the game reaches a "game over" state (indicated by the `g_game_over` global variable in this project). For our version of Snake, the core game loop is as follows:
1. wait (for some specified amount of time) for user input;
2. retrieve user input;
3. update the game state based on user input; and
4. render the new game state to the screen.
To begin with, you will implement steps 1, 3, and 4 of the core game loop in the `main` function of `snake.c` (look for the `TODO` for Part 1A).
:::info
**Note:** You will initially update the game state without handling user input, so you will see your snake appear and move but not respond to arrow keys. *This is okay!* Once you have an `update` function that successfully updates the snake's movement, overall game state, and checks for wall collisions, you will handle user input.
:::
For now, there are three function calls you need to make in your game loop:
1. [**`usleep(useconds_t usec)`**](https://man7.org/linux/man-pages/man3/usleep.3.html): a library function that suspends execution for a some amount of time, measured in microseconds (we recommend 100 milliseconds, i.e., 100,000 microseconds, but you can adjust this to speed up or slow down your snake!).
2. **`update(int* cells, size_t width, size_t height, snake_t* snake_p,
enum input_key input, int growing)`**: the update function you will need to implement in Part 1B that updates the game state based on user input (see the stencil for more details).
3. **`render_game(int* cells, size_t width, size_t height)`**: a function we give you as part of the stencil that renders the given game state into a visual game! You will not need to modify this function.
Since we're not handling user input yet, you will pass in `INPUT_NONE` as the `input` argument to `update`. Additionally, since our snake does not yet grow, you will pass in `0` as the last argument to `update`. Furthermore, since we are not using the `snake_p` argument yet, you will pass `NULL` as this argument. In other words, your call to `update` will look like this: `update(???, ???, ???, NULL, INPUT_NONE, 0)`, where you'll have to figure out what to pass for each `???`.
Read through the `main` function in `snake.c` to make sure you understand what it's doing! We don't expect you to know what every single function does, but you should understand the general structure.
::::success
**Task:** Implement the core game **loop** in the `main` function of `snake.c`!
::::
::::warning
**☑️ Testing Point A:**
_Now go and read the testing section below if you haven't already. It tells you how to run the tests!_
After running `make check`, you should pass tests 1 and 2 at this point! This means that you should be able to see a board with 10 rows and 20 columns, with walls around the edges, and a snake initialized at the third row down and third column from the left. The snake should not move.
In other words, when you run `./snake 0`, you should see the following:
<br />
<center>
<img src="https://csci0300.github.io/assign/projects/assets/snake-testpoint1.png">
</center>
<br />
<details>
<summary><b>If your program exits immediately after running</code></b></summary>
Think about what you need to have to make sure the game stays on the screen continuously. Remember, it's a game <i>loop</i>.
</details>
<br />
:::info
**Note:** It won't be possible to play the game yet, so the only thing you can do is exit. **To exit the game, press `Ctrl + C`**, which is a standard terminal signal to tell the current program to quit.
:::
::: success
**Pro tip**: When running the tests, you can use `make check` to run a certain subset of tests, like this:
```console
# Run tests 1-2 (or 1-10, 20-30, etc.)
$ make check-1-2
```
This saves you from needing to sift through all the test output! For more helpful commands, see the [Testing](#Testing) section.
:::
::::
:::success
⛳ **Checkpoint:** _Congratulations! You have completed the section required for the Part 1A checkin._ Please be sure to push your code to Github click the "Test Part 1A checkoff" button on the grading server so that we can check off your work.
If you don't reach this point by the checkin deadline, please come to TA hours so that we can help you get off to a successful start!
:::
# Part 1B: Updating and Running the Game
### Updating the Snake's Position
Now that you have defined a way to represent the snake in our game, you can use your representation (as well as the variables storing the game and board data) to begin implementing the `update` function in `game.c`. First, you will need to write the functionality that allows your snake to move while on the board.
:::info
**Note:** In most versions of Snake, **the snake initially moves to the right**. Make sure that you replicate this convention and that your snake starts moving right when the game is initialized!
:::
The full description of the `update` function can be found in the stencil, but below is a short summary for reference.
::::info
`void update(int* cells, size_t width, size_t height, snake_t* snake_p, enum input_key input, int growing)`
<details>
<summary><b>Function Summary</b></summary>
<br />
**Purpose:** updates the `cells` array and other game data according to `input`, including the `g_game_over` and `g_score` global variables when needed, and the snake's position if the game is not over.
**Arguments**:
* `cells`: an array of integers representing each board cell
* `width`: the width of the board
* `height`: the height of the board
* `snake_p`: a pointer to your snake struct (not used until part 3!)
* `input`: the next input
* `growing`: an `int` representing whether we want the snake to grow upon eating food (`growing = 1`), or not (`growing = 0`).
**Returns:** Nothing! But the function should modify the game, board, and snake data appropriately to reflect the user's input and the snake's behavior.
</details>
::::
For now, we will only consider the case where the user input is `INPUT_NONE` (i.e. there is no user input). This means that your update function should shift the snake's position by one cell to the right, because the snake's default initial direction is to the right and we aren't taking any user input yet.
::::success
**Task:** Implement `update` so that your snake's position shifts by one cell to the right whenever `update` is called, and the game board is updated to reflect the new snake position.
<details>
<summary><b>Hints!</b></summary>
<br />
You will need to update your variables storing snake data *and* the board (from the cells array passed into `update`) to reflect the snake's new position.
* This is an instance of a common pattern in computer systems: metadata about the system state and the actual system state must always be updated together. This maintains an _invariant_ that system state and metadata always match (the metadata would be rather unhelpful if this were not the case!).
When should you initialize your snake? Where on the board should you initialize your snake?
* Hint: The board data should be initialized -- with bit flags set -- before the snake is initialized.
</details>
::::
<section>
### Important background: Cell types and bit flags
In the stencil, the `cells` array is defined as an array of integers. This means that each cell on the board has an integer representing what type of cell it is (i.e., a wall, an empty cell, a food cell, a snake cell, or a grass cell). We would like our game implementation to support cells that have multiple properties, such as a snake hiding in grass, or food hidden in grass. To use a single integer to represent these properties of a cell, we use the different **bits** within the integer value to represent the different states a cell can be in.
A 4-byte (32-bit) integer can hold up to 32 bit flags, but we only need four for the basic game (defined in `common.h` and shown below). Additionally, `PLAIN_CELL`, corresponds to when no bit flags being set (i.e., a plain cell).
```c++
// Bit flags enable us to store cell data in integers!
// The "0b" notation indicates binary numbers.
#define PLAIN_CELL 0b0000 // equals 0
#define FLAG_SNAKE 0b0001 // equals 1
#define FLAG_WALL 0b0010 // equals 2
#define FLAG_FOOD 0b0100 // equals 4
#define FLAG_GRASS 0b1000 // equals 8
```
Therefore, we can set a cell to one of these `FLAG_*` values to indicate a certain type of cell.
There's also another twist, which makes bit flags important: in our game, some cells can overlap: `FLAG_GRASS` can overlap with `FLAG_FOOD` or `FLAG_SNAKE`, but no other overlapping flags are allowed. For example, if a cell had `FLAG_WALL` and `FLAG_SNAKE` set, the snake would have walked into a wall. Thus, to update the board, we'll need to consider the different combinations of bit flags... which is what we'll handle next!
(Additionally, you can further exploit the fact that cells can be in multiple states at the same time in our exciting extra credit exercises ✨.)
</section>
### Handling overlapping Snake and Grass
Our version of the game allows for `FLAG_GRASS` to overlap with `FLAG_SNAKE` in a cell on the board. But how can we manipulate the individual binary bits within a cell? Enter: bitwise operators!
Bitwise operators allow manipulating the individual bits within a variable. C supports several bitwise operators, including but not limited to:
* `&` is AND, which puts a 1 bit in the result if both input numbers have a 1 in the same position, otherwise it puts 0. For example, `0b0110 & 0b1100` results in `0b0100`.
* `|` is OR, which puts a 1 bit in the result if either one or both input numbers have a 1 in a position, otherwise it puts 0. For example, `0b0110 | 0b1100` results in `0b1110`.
* `^` is XOR, which puts a 1 bit in the result if **exactly one** of the two input numbers has 1 in a specific position (but not if both do), otherwise it puts 0. For example, `0b0110 ^ 0b1100` results in `0b1010`.
For the full list of the bitwise operators in C, see <u>[this section](#src)</u> in part 3!
::::warning
<details>
<summary><b>⚠️ IMPORTANT READ: How to update board with bitwise operators</b></summary>
Let's imagine that a snake moves onto a block of grass. The grass is still on that block, but so is the snake. So, we need to represent the cell as having both states.
```
int cell = FLAG_SNAKE | FLAG_GRASS;
```
We know that `FLAG_SNAKE = 0b0001` and `FLAG_GRASS = 0b1000`, so `FLAG_SNAKE | FLAG_GRASS = 0b1001`.
<br/>
<b>Checking for a snake in the cell</b>
With this `cell` that is `0b1001`, how can we check whether there is a snake on this block? If we check `cell == FLAG_SNAKE`, the result will be **false**, because `0b1001 != 0b0001`. Luckily, we have the `&` operator!
```
bool has_snake = cell & FLAG_SNAKE;
```
Because `cell = 0b1001` and `FLAG_SNAKE = 0b0001`, `cell & FLAG_SNAKE = 0b0001`. Remember that in C, 0 represents **false**, and any non-zero number is considered **true**. So, we get **true**, meaning that this block has a snake on it!
<br/>
<b>Modifying cell state</b>
Now, let's imagine that the snake moves off this block. The block will still have grass on it, but will no longer have the snake. How can we update the cell state?
```
int new_cell = cell_state ^ FLAG_SNAKE;
```
Again, `cell = 0b1001` and `FLAG_SNAKE = 0b0001`, so `cell ^ FLAG_SNAKE = 0b1000`. Remember that `FLAG_GRASS = 0b1000` as well! We have successfully removed the snake from the cell but kept the grass.
Note: Visually, your snake symbol should turn green when you enter the grass. If it's not, double check your bitwise operator usage to make sure both flags are being set simultaneously!
<br />
</details>
::::
:::info
<details> <summary> <i>Food for thought </i>: what advantages do representing our states with bit flags give us? </summary>
Think about the alternative where we don't use bit flags:
PLAIN_CELL = 0
SNAKE = 1
WALL = 2
FOOD = 3
GRASS = 4
In this scenario, how would you represent a cell that contains both snake and grass? One solution might be to create another representation for SNAKE_AND_GRASS. Do you see how this could complicate the logic as the game grows in complexity? Contrast that with our representation that allows us to represent every combination of state with just the original flags...
</details>
:::
::::success
**Task:** Ensure your `update` properly allows the snake to move into a grass cell (causing the snake to turn green). Additionally, make sure that each cell reverts back to their original bit flag when the snake moves out of the cell.
::::
### Collisions with Walls
Now, your snake can move across the board and hide in grass! But, as you should notice, your snake doesn't stop when it hits a wall, and passes right through instead!
We don't want this to happen; if your snake hits a wall, it should stop moving and the game should end immediately (think back to the game loop you wrote in `snake.c`: when does your loop break?). Your next task is to modify your `update` function so that if your snake's new position has a wall there, then the game ends. Make sure your game ends **before** your snake actually moves into the wall! We don't want your snake to appear to move through walls. Make sure to think about what `update` should do if `g_game_over` is set to 1.
:::info
**Note:** So far, we have been using the default board to run your game, but later on, you will need to handle custom boards, which may or may not have internal walls that your snake can crash into.
:::
::::success
**Task:** Modify your `update` function so that your snake collides with walls and the game ends if any such collision happens.
::::
:::warning
**☑️ Testing Point B:** You should pass tests 3-6 at this point. Your moving snake should hit the wall to the right of the board, which should then cause the game to end.
:::
### Getting User Input
You've probably watched your snake crash into the right wall of the board many times now :(
Let's give your snake a way to avoid crashing! Your next task will be to modify your game loop in `snake.c` and your `update` function so that you can get user input, and update your snake's position based on the direction specified by the user.
We've given you a function in `snake.c`, called `get_input`, that gets arrow key input from your keyboard and converts it into an `enum input_key` - one of the enums representing a key input. Currently, when you call `update` in your game loop, you pass in `INPUT_NONE` as `input`, and `update` defaults to shifting the snake to the right. Now, you will now need to change this so that you pass in the output of `get_input` as the `input` parameter to `update`.
:::success
**Task:** Modify your game loop in `snake.c` so that you can get input from the user, and pass this input into the call to `update`.
:::
Now that your `update` function will take in different inputs (as its second to last argument), you will need to modify it once again to handle each of these different inputs, so that your snake's position is updated according to the last input by the user. Note that it **is** valid for a snake of length 1 to double back on itself (e.g. to go from moving right to moving left.)
:::info
**Aside**: For all three parts of this project, try playing the [this version](https://playsnake.org/) to figure out how to handle any edge cases you come up with! This will also be useful when trying to pass any of our tests that test for specific edge cases.
(For more fun, you can also play [this version](https://elgoog.im/snake/on-google-maps/), which was once an "easter egg" hidden in Google Maps!)
:::
::::success
**Task:** Modify your `update` function so that it can handle every type of user input, and update the snake data and board accordingly.
::::
:::warning
**☑️ Testing Point C:** You should pass tests 7-11 at this point. You should now be able to control your snake's movement using the arrow keys! Your snake should still be able to crash into the wall and end the game.
:::
### Food
You almost have a fully playable game! The last component that we're missing is the food (without which, of course, you can't score). Next, you will need to modify your `update` function further so that if your snake "collides" with a cell on the board that contains food, `update` does the following:
- Your snake eats the food (so the food disappears)
- The snake's position is updated
- The game's score is updated
- New food is placed on the board
We have provided you with the function `place_food` in`game.c` to randomly place food on the game board. It's up to you to determine the correct place to call `place_food`!
**For now, your snake does not need to grow when it eats food. You will implement this functionality in Part 3 of this project.**
::::success
**Task:** Modify your `update` and `initialize_game` functions so that your snake can eat food, and new food is placed on the board whenever the snake eats.
<details>
<summary><b>Hint!</b></summary>
<br />
Why did we include `initialize_game` in the task? What does that function have to do with food placement?
</details>
::::
:::warning
**☑️ Testing Point D:** You should pass tests 12-16 at this point. Your snake should now be able to move around the board and eat food, as long as you don't crash into a wall!
:::
**Yay!!! All done with Part 1.**
# Part 2: Board Decompression (`game_setup.c`)
Now that we have basic game play set up for our default board, we can now implement the functionality for setting up and running custom boards.
Because the Snake game is more fun when you can play custom levels, your game will have support for loading user-specified board layouts as a command-line argument. Let's think about how you might tell the game what board you want to run!
<section>
### Important background: specifying levels (with Run-length encoding)
Humans are good at dealing with readable strings, so our first plan is to encode the state of each square of the board (wall, empty, contains snake, etc.) as a letter. For example, "E" denotes an empty square, "W" denotes a square that contains a wall, etc. If we teach our program how to read these strings, we can give it any board we want.
In this representation of a custom board, the board is represented by a looooong string that contains exactly one character for every cell on the board. For example, an 80x24 board (a typical terminal size, [which goes back to the 1970s](http://www.righto.com/2019/11/ibm-sonic-delay-lines-and-history-of.html)) would look like this:
```
WWWWWWWWWWWWWWWWWWWWWWWWWWWWWWWWWWWWWWWWWWWWWWWWWWWWWWWWWWWWWWWWWWWWWWWWWWWWWWW
WEEEEEEEEEEEEEEEEEEEEEEEEEEEEEEEEEEEEEEEEEEEEEEEEEEEEEEEEEEEEEEEEEEEEEEEEEEEEEW
WEEEEEEEEEEEEEEEEEEEEEEEEEEEEEEEEEEEEEEEEEEEEEEEEEEEEEEEEEEEEEEEEEEEEEEEEEEEEEW
WEEEEEEEEEEEEEEEEEEEEEEEEEEEEEEEEEEEEEEEEEEEEEEEEEEEEEEEEEEEEEEEEEEEEEEEEEEEEEW
WEEEEEEEEEEEEEEEEEEEEEEEEEEEEEEEEEEEEEEEEEEEEEEEEEEEEEEEEEEEEEEEEEEEEEEEEEEEEEW
WEEEEEEEEEEEEEEEEEEEEEEEEEEEEEEEEEEEEEEEEEEEEEEEEEEEEEEEEEEEEEEEEEEEEEEEEEEEEEW
WEEEEEEEEEEEEEEEEEEEEEEEEEEEEEEEEEEEEEEEEEEEEEEEEEEEEEEEEEEEEEEEEEEEEEEEEEEEEEW
WEEEEEEEEEEEEEEEEEEEEEEEEEEEEEEEEEEEEEEEEEEEEEEEEEEEEEEEEEEEEEEEEEEEEEEEEEEEEEW
WEEEEEEEEEEEEEEEEEEEEEEEEEEEEEEEEEEEEEEEEEEEEEEEEEEEEEEEEEEEEEEEEEEEEEEEEEEEEEW
WEEEEEEEEEEEEEEEEEEEEEEEEEEEEEEEEEEEEEEEEEEEEEEEEEEEEEEEEEEEEEEEEEEEEEEEEEEEEEW
WEEEEEEEEEEEEEEEEEEEEEEEEEEEEEEEEEEEEEEEEEEEEEEEEEEEEEEEEEEEEEEEEEEEEEEEEEEEEEW
WEEEEEEEEEEEEEEEEEEEEEEEEEEEEEEEEEEEEEEEEEEEEEEEEEEEEEEEEEEEEEEEEEEEEEEEEEEEEEW
WEEEEEEEEEEEEEEEEEEEEEEEEEEEEEEEEEEEEEEEEEEEEEEEEEEEEEEEEEEEEEEEEEEEEEEEEEEEEEW
WEEEEEEEEEEEEEEEEEEEEEEEEEEEEEEEEEEEEEEEEEEEEEEEEEEEEEEEEEEEEEEEEEEEEEEEEEEEEEW
WEEEEEEEEEEEEEEEEEEEEEEEEEEEEEEEEEEEEEEEEEEEEEEEEEEEEEEEEEEEEEEEEEEEEEEEEEEEEEW
WEEEEEEEEEEEEEEEEEEEEEEEEEEEEEEEEEEEEEEEEEEEEEEEEEEEEEEEEEEEEEEEEEEEEEEEEEEEEEW
WEEEEEEEEEEEEEEEEEEEEEEEEEEEEEEEEEEEEEEEEEEEEEEEEEEEEEEEEEEEEEEEEEEEEEEEEEEEEEW
WEEEEEEEEEEEEEEEEEEEEEEEEEEEEEEEEEEEEEEEEEEEEEEEEEEEEEEEEEEEEEEEEEEEEEEEEEEEEEW
WEEEEEEEEEEEEEEEEEEEEEEEEEEEEEEEEEEEEEEEEEEEEEEEEEEEEEEEEEEEEEEEEEEEEEEEEEEEEEW
WEEEEEEEEEEEEEEEEEEEEEEEEEEEEEEEEEEEEEEEEEEEEEEEEEEEEEEEEEEEEEEEEEEEEEEEEEEEEEW
WEEEEEEEEEEEEEEEEEEEEEEEEEEEEEEEEEEEEEEEEEEEEEEEEEEEEEEEEEEEEEEEEEEEEEEEEEEEEEW
WEEEEEEEEEEEEEEEEEEEEEEEEEEEEEEEEEEEEEEEEEEEEEEEEEEEEEEEEEEEEEEEEEEEEEEEEEEEEEW
WEEEEEEEEEEEEEEEEEEEEEEEEEEEEEEEEEEEEEEEEEEEEEEEEEEEEEEEEEEEEEEEEEEEEEEEEEEEEEW
WWWWWWWWWWWWWWWWWWWWWWWWWWWWWWWWWWWWWWWWWWWWWWWWWWWWWWWWWWWWWWWWWWWWWWWWWWWWWWW
```
This is a 1,920 character string! It would be **very** tedious to type in if you found an exciting new Snake level posted in a retro gaming magazine. How can we make this representation more efficient?
Clearly, there is a lot of redundancy in this representation: many lines just consist of repeated "W" or "E" characters. To avoid this repetition, we can specify the number of instances of a character, such as "E78" to mean "78 instances of E". This is a common compression technique called a **Run-Length Encoding** (RLE).
A run-length encoded version of the above board (going row-by-row) yields this *much* shorter string:
```
W80W1E78W1W1E78W1W1E78W1W1E78W1W1E78W1W1E78W1W1E78W1W1E78W1W1E78W1W1E78W1W1E78W1
W1E78W1W1E78W1W1E78W1W1E78W1W1E78W1W1E78W1W1E78W1W1E78W1W1E78W1W1E78W1W1E78W1
W1E78W1W80
````
To make this more readable, let's introduce a delimiter between adjacent rows:
```
W80|W1E78W1|W1E78W1|W1E78W1|W1E78W1|W1E78W1|W1E78W1|W1E78W1|W1E78W1|W1E78W1|
W1E78W1|W1E78W1|W1E78W1|W1E78W1|W1E78W1|W1E78W1|W1E78W1|W1E78W1|W1E78W1|W1E78W1|
W1E78W1|W1E78W1|W80
````
As a sanity check against incorrect transcription, we can add the board size at the beginning, encoded as "B" followed by the height (number of **rows**) and width (number of **columns**), and we can use the "S" character to encode the starting position of the snake. **For this project, we will use "S1" to encode a single-cell snake.** We will only ever support one snake cell in our program, so decompression of a different numbered snake should raise an error.
Of course, **don't forget about grass!** In the board string, we use "G" to represent a block with grass. Although a snake will never _start_ on a block with grass, remember that once the game begins, the snake or food can be on the same cell as grass.
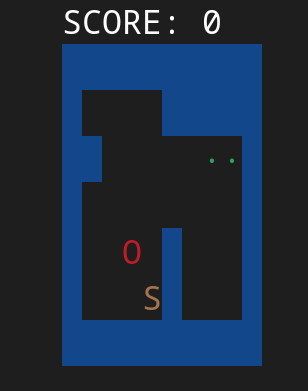
The following example represents a 7-row, 10-column board with some internal walls and a snake at the bottom center:
```
B7x10|W10|W1E4W5|W2E5G2W1|W1E8W1|W1E4W1E3W1|W1E2S1E1W1E3W1|W10
```
On the screen, this board will look something like this:
**So how do we use the board string?** In our game, we'll pass in the board string a second (optional) argument to the `snake` program:
```shell
# Run snake with this custom board
# (The `0` says that the snake growth (part 3) is turned off)
$ ./snake 0 "B7x10|W10|W1E4W5|W2E5G2W1|W1E8W1|W1E4W1E3W1|W1E2S1E1W1E3W1|W10"
```
</section>
<br />
<section>
### Important background: Handling Errors
As you may have thought about, there are countless ways that a RLE-encoded board representation can be incorrect. These can range from problems with the actual board, to errors when writing the string.
As a general design principle, we prefer that our programs be able to explicitly handle expected errors, rather than leaving it up to undefined behavior to dictate what our code will do. However, because there are *many* different errors, our tests only require that you handle a subset of them. (You are welcome to still handle other errors if you wish!)
:::info
**Errors you are required to handle:**
In `game_setup.h`, you are provided the following enum:
```c
enum board_init_status {
INIT_SUCCESS, // no errors were thrown
INIT_ERR_INCORRECT_DIMENSIONS, // dimensions of board do not match dimensions specified by the string
INIT_ERR_WRONG_SNAKE_NUM, // no snake or multiple snakes are on the board
INIT_ERR_BAD_CHAR // string contains a character that was unexpected
};
```
We guarantee the following about the strings that we will test your implementation against (although once again, you are more than welcome to cover other error cases):
* Letters will always be followed by positive, non-zero numbers (staying true to RLE)
* The dimensions will always be specified at the beginning of the string, and will be followed by the correct delimiter
* Dimensions will be larger than 0
<details><summary><b><code>INIT_ERR_INCORRECT_DIMENSIONS</code></b></summary>
<br />
<b>Definition:</b> <code>INIT_ERR_INCORRECT_DIMENSIONS</code> should be returned if the dimensions specified at the start of the encoded string do not match the dimensions of the board specified by the string.
<br />
<br />
<b>Example:</b>
```
B3x5|W5|W1E1S1E1W1|W1E3W1|W5
```
The above string is wrong, because the dimensions at the front specify that the board should have 3 rows, but rest of the string encodes 4 rows worth of cells.
This error also applies to mismatches between the dimensions specified and the number of columns. Think about what a string that is incorrect in this way would look like!
</details>
<details><summary><b><code>INIT_ERR_WRONG_SNAKE_NUM</code></b></summary>
<br />
<b>Definition:</b> <code>INIT_ERR_WRONG_SNAKE_NUM</code> should be returned if there does not exist <b>exactly</b> one snake cell on the board.
<br />
<br />
<b>Example:</b>
```
B3x3|W3|W1E1W1|W3
```
In the above example, there are no snake cells. This error also applies to boards that start with too many snake cells: try and come up with example strings that demonstrate this!
</details>
<details><summary><b><code>INIT_ERR_BAD_CHAR</code></b></summary>
<br />
<b>Definition:</b> <code>INIT_ERR_BAD_CHAR</code> should be returned if you encounter an "alien" character. There are many ways to define what an "alien" character is, but we will define it as <b>characters that are not expected to be found in a correctly formatted RLE-encoded board string</b>.
<br />
<br />
<b>Examples:</b>
```
B3x3|W3|W1S1Z1|W3
```
```
A1-4|W2S1W1
```
In the first example, we see an unexpected character, `"Z"` that does represent any valid cell type on our board. In the second example, `"-"` is used as a delimiter between the height and the width of the board, where we expect to see `"x"`. Additionally, the string starts with "A" instead of "B".
</details>
:::
</section>
<br />
::::success
**Task:** Implement `decompress_board_str()` with proper error handling. Look at the dropdown for more details (and a helpful hint)!
<details><summary><b>Function Summary</b></summary>
<br />
```c
enum board_init_status decompress_board_str(int** cells_p, size_t* width_p, size_t* height_p, snake_t* snake_p, char* compressed)
```
Takes in a pointers to board data (<code>cells_p</code>, <code>width_p</code>, <code>height_p</code>), pointer to a snake struct (not used until part 3), and a RLE-encoded string containing the custom board (<code>compressed</code>), and should populate the cells of the board with the correct values that correspond to the string.
This function returns a value of type <code>enum board_init_status</code>. This type represents whether the board decompression was successful, and will be communicated to the main game loop by `initialize_game`. (This means that the return value of `initialize_game` should no longer unconditionally be the return value of `initialize_default_board`!) If no errors arise, then `INIT_SUCCESS` should be returned.
</details>
<details><summary><b>A Rough Strategy</b></summary>
<br />
Below, we have given you some of the steps you could take to write `decompress_board_str` (but there can be many other valid ways of implementing this function!)
1. Try and first break down the compressed string into smaller pieces. Think about how you can leverage the delimiter character "|", which separates the encoding of our board by row.
2. Figure out how to set the dimensions of your board according to what was specified in the prefix of the encoded string. Here, "x" is your magical delimiter—you know that everything between the starting "B" and "x" should be an integer that corresponds to the height of the board, and everything between the "x" and the first "|" delimiter will correspond to the width of the board. Note: this can be trickier than it seems so we suggest encapsulating the logic in a helper function.
3. You will likely want to loop through your strings and fill in the board's cells as you go. This means that you will need to store some information regarding **where in the board you are**, **what type of cell you are currently reading**, and **how many consecutive cells of that type you want to fill in**.
</details>
<details><summary><b>Hints!</b></summary>
<br />
1. It may be a good idea to first take a look at [**C's string library functions**](https://man7.org/linux/man-pages/man3/string.3.html) (`strtok`, `strtok_r`, or `strtol` might be of particular use). Many of these functions will likely handle some of the steps you come up with to decode a compressed board string, so make sure to take a look at some of their descriptions!
:::warning
<details><summary><b><code>strtok</code> warning!</b></summary>
<br />
`strtok` cannot parse two different strings at once! If you need to begin parsing one string, switch to parsing another string, and then back to the first string, consider [`strtok_r`](https://man7.org/linux/man-pages/man3/strtok.3.html)!
</details>
:::
2. There are a few different ways to convert strings to integers: some helpful functions to consider are [<code>strtol</code>](https://man7.org/linux/man-pages/man3/strtol.3.html) and [<code>atoi</code>](https://man7.org/linux/man-pages/man3/atoi.3.html)! Alternatively, you can also leverage the fact that the hex-encodings of numerical characters range from `0x30` (0) to `0x39` (9), and subtract accordingly.
- `atoi` is a simpler, more common version of `strtol`, but is more limited. Most documentation online will recommend `atoi`, but we recommend checking out `strtol` too--the extra arguments can be particularly useful for some strategies!
3. `sscanf` can extract components of strings that follow a well-defined format, similar to how `printf` can print messages in a pre-defined format. It's not feasible to parse a whole board string with one `sscanf` call, but you might find it useful for parsing certain small components
4. It is *strongly recommended* that you design and implement some helpers for `decompress_board_str`. Parsing and manipulating strings in C can become complicated, so having a few helpers that handle repeated subtasks will help you organize your code.
Here are three helper functions we specifically recommend:
- `enum board_init_status set_dimensions (fill in arguments)`
- Given some dimensions string (ex. 'B78x10'), extract the corresponding width and height
- `int get_cell_pos (fill in arguments)`
- Takes in row and column of a board and returns corresponding index of the board's cell array
- `enum board_init_status fill_cells (fill in arguments)`
- Given a start index into cells, a number, and a character, fill cells[start index] to cells[start index + number] with the character’s flag
5. If "random" snakes are appearing on your boards, double check that you've removed the harcoded snake from the previous section!
</details>
::::
::::success
**Task:** If you have not already done so, update `initialize_game` to support decompression! This function should call on `decompress_board_str` if the string passed into it (`board_rep`) is *not* `NULL`. If it is, then just initialize the default board with `initialize_default_board`.
Notice that now, `initialize_game` must not always return `INIT_SUCCESS`, because decompression can return a number of failure statuses. If necessary, update the return value accordingly! Also make sure you handle these fail statuses in `main` if needed!
::::
:::warning
**☑️ Testing Point E:** You should pass tests 16-28 at this point. You should also be able to create custom boards from compressed board strings, and play through them.
:::
### Edge cases
Now that your game can handle different boards, it means we can test more complex cases for game logic than we could before. At this point, it's a good idea to go back and check your game logic to make sure you can handle more complex situations (and, now that you've expanded your C programming skills!).
::: success
**Task**: Tests 29-31 some more complicated edge cases with snake movement. Run these tests: if you have bugs, you may need to revisit your logic for `update` and/or bitwise operators. Some notes:
- Test 29 is the first test where the snake moves on a custom board. If you are failing this test, and/or you notice multiple snakes showing up, consider how you set your metadata for the snake's position (from part 1) when parsing a custom board string.
- For more discussion on how bitwise operators work, see the important background starting [here](#Important-background-Cell-types-and-bit-flags)
- To see the details of each test, check out `test/traces.json`. See the [Testing](#Testing) section for more info on how to interpret this file
:::
**Woo! Congratulations on finishing part 2!** :tada:
# Part 3A: Growing Snake
Before we add any functionality to our snake, let's reconsider how we store our snake's data. Currently, we use global variables to store our snake data. However, as the amount and complexity of the data we want to store about our snake increases, this becomes harder to keep track of--we have to keep a mental tally of how every function in our program interacts with these global variables. To remedy this, we will move to using a struct to represent snake data, allowing us to pack our snake data together in a much more coherent and readable way.
::::warning
<details>
<summary><b>Caution for global variables</b></summary>
<br />
In general, it is best practice to avoid using non-constant global variables. In part 1, we had not yet covered structs, and so we used global variables to aid as a gentler introduction to C. If you would like more details about why global variables are discouraged, see [this article](https://embeddedartistry.com/fieldatlas/the-problems-with-global-variables/).
</details>
::::
Take a look at `common.h` again. We have declared for you a snake struct that we will refer to as `snake_t` to store all your snake data. Also note that we already define a variable of type `snake_t` in `main` for you.
:::success
**Task:** At the bottom of `common.h` fill in the snake struct with the snake data **you declared in 1A**. We already reserve the space for a `snake_t` in `snake.c`-- so you can remove the definitions of your snake data in `common.c` and the declarations for your snake data in `common.h`. You should only move your snake data to the struct -- you do **not** need to move the global variables `g_game_over` or `g_score`.
Now modify `initialize_game` and `update` to use your snake struct instead of global variables.
:::
We've now got a moving snake with a better data structure… but it is still a very very short snake. It would be nice if our snake would actually grow upon eating food.
This means we'll need to extend our current `snake` struct definition to handle *multiple* snake coordinates (one for each cell of the snake). We could do this in a number of ways:
- We could add, say, 100 extra x- and y-position fields to our struct, and use them to store the snake's position(s) as it grows longer. However, we'd only be able to support snakes of up to length 100.
- We could replace the current coordinate fields with an array of positions, [and extend the array as necessary](https://man7.org/linux/man-pages/man3/realloc.3.html). However, we'd have to update every entry in the array whenever the snake moves. (Note: it is possible to avoid doing so. Can you think of an approach that could avoid updating every single array entry at every step?)
- Or…
## Linked Lists
- We could add a field with a pointer to a [linked list](https://en.wikipedia.org/wiki/Linked_list) of coordinates, and extend/trim the list as the snake moves. This would require fewer updates than either of the prior two approaches, while accomplishing our goal of implementing a longer-than-one-cell snake!
:::warning
:warning: This part of the project makes use of your linked list code from Lab 2.
**If you have not completed Lab 2, you should do it now!** :warning:
:::
:::success
**Task:** Copy your (fixed!) linked list code from Lab 2 into your snake folder. To do this, delete the contents of `linked_list.c` and `linked_list.h` in your snake project folder and paste in your versions from lab 2.
Additionally, now that your snake representation will need to use the structs and functions from `linked_list.<c|h>`, we need to introduce the linked list code to `common.<c|h>`, where our snake and board are defined.
To do so, add the following line to the top of `common.h`:
```c
#include "linked_list.h"
```
For examples on how to work with the linked list, take a look at `linked_list_test.c` from lab 2!
:::
:::success
**Task:** Update your `snake` struct to use the linked list library (the `ll_*` functions) to store the snake's current position, then update the rest of your game code accordingly. The snake doesn't need to grow yet, but your code should still pass the same tests.
:::
#### A Snake that Grows
We're almost there! Now we need to figure out how to 1) extend the snake when it eats food and 2) update the list of positions when the snake moves.
:::warning
**Warning:** The snake should only grow if `snake_grows` is equal to `1`. If your snake grows when `snake_grows` is 0, your code may fail prior tests!
:::
::::success
**Task:** Implement snake growth on food consumption (and provided `snake_grows` is `1`).
<details><summary><strong>Hints on growth</strong></summary>
<br />
Start by considering the list corresponding to a snake with a length of at least three. When the snake moves one step:
* Which elements can you keep the same?
* Which elements should you discard from the list?
* What do you want to add to / update about the list?
We recommend you draw this out for yourself!
You may also run into a couple of edge cases while testing your implementation:
* What happens if the snake hits itself?
* What if the head of the snake moves into the space that the tail of the snake just left?
* See the note below about the snake backing into itself!
:::info
**Snake Backing:** In the actual snake game, if the snake is length 2 or longer and immediately tries to go back the way it came (backing into itself), the movement is not accepted and the snake continues to move in its previous direction. If the snake is length 1, it should be able to immediately go back the way it came. *We would like you to replicate this behavior so that the game doesn't end any time the snake tries to collide with itself by moving backwards!*
:::
</details>
::::
:::warning
**☑️ Testing Point F:** You should pass tests 32-41 at this point. Your snake should now grow when it eats food!
:::
# Part 3B: Game Over display + learning about Unicode
You've almost got a complete game! Let's wrap it up nicely with a personalized Game Over screen featuring the player's name and their score.
### Rendering the Game Over screen
We've provided a few helper functions for rendering the Game Over screen:
- `end_game`, which calls `render_game_over` and manages some graphics boilerplate
- `render_game_over`, which renders a Game Over screen featuring the player's name and score.
`render_game_over` is located within `game_over.c` (and `game_over.h`), which has not been included in compilation up until this point. This is because it isn't in the *Makefile*. Makefiles tell the compiler how to manage your source code files; you'll learn more about this in [Lab 1](https://csci0300.github.io/assign/labs/lab1.html).
:::success
**Task:** Look through the Makefile and find `OBJS = src/game.o src/game_setup.o …`. Add `game_over.o` to the list of objects to be compiled. Then, **uncomment** `render_game_over` in `game_over.c`.
Now, try compiling the project. What happens?
:::
Oh no! It looks like one of our functions assumes that some global variables exist. Look through the code in `game_over.c` and see if you can figure out why they are needed, and what their types are. (**Hint:** How do we represent strings in C?)
:::success
**Task:** Add the necessary global variables to `common.<c|h>` so that the project compiles successfully.
:::
### Prompting and reading in user input
We now have variables for the player's name and its length. We still need a way to prompt the user to enter their name and parse the input. Head on over to the `read_name` function in `game.c`, where you'll implement this functionality for reading in user input.
First, you want to print out a prompt for the user (e.g. `"Name > "`). Then, use the [`read` system call](https://man7.org/linux/man-pages/man2/read.2.html) to read their response. **Note that the `read` system call does not null-terminate the data that it reads!**
* If the user presses enter without inputting anything else, *print an error message saying `"Name Invalid: must be longer than 0 characters."` and reprompt the user for their name.*
Once the user inputs a name with at least one character (apart from hitting enter), then store their name and return.
:::success
**Task:** Implement `read_name` as detailed in the dropdowns below. Once you have done so, uncomment the following lines in `main` (`snake.c`):
```c
// TODO: Implement (in Part 3B)
char name_buffer[1000];
read_name(name_buffer);
```
```c
void read_name(char* write_into)
```
<details>
<summary><b>Function Summary</b></summary>
<br />
**Purpose:** Prints a prompt to the console asking the user to input their name (e.g. `"Name > "`, and reads in the user input. If at least one character is inputted, stores the input in the string buffer, `write_into`. Otherwise, prints an error and reprompts.
**Arguments:**
* `write_into`: String buffer where the user's input will be stored
**Returns:** Nothing, but if the user enters without typing any other characters, the function should print the following error to the console and repeat the earlier steps of the function.
* Error: `"Name Invalid: must be longer than 0 characters."`
</details>
<details>
<summary><b>Implementation Notes!</b></summary>
<br />
**Prompting**
1. You may use the `printf` function to print out your prompt to the console.
2. After you print out your prompt, use `fflush` to forcibly flush the buffer:
```c
fflush(<file descriptor of where you are reading from>);
```
*This is because by default, whatever you wish to write gets added to a buffer, so you sometimes need to forcibly flush the buffer before reading in input! Without the call to `fflush`, you may or may not see your printed prompt.*
**File Descriptors**
The first argument to the [`read` system call](https://man7.org/linux/man-pages/man2/read.2.html) is an integer representing a *file descriptor*. You'll learn more about file descriptors later in the course, but for now, you can think of it as telling the computer where it should read from. Listed below are three very common file descriptors and the locations that they correspond to. It's up to you to figure out which one you want to read input from!
| FD | Location | Abbreviation |
| --- | --- | --- |
| 0 | Standard Input | STDIN |
| 1 | Standard Output | STDOUT |
| 2 | Standard Error | STDERR |
**Length to read**
The third argument to the `read` system call is a value of type `size_t` denoting how many bytes we want to read. While we ideally do not want to be making assumptions about how long people's names are, we unfortunately need to tell the computer how much to read. To that end, **set this value to 1000** in order to be fairly generous with the size of our input.
**Erroring appropriately**
When the user presses enter without entering any other characters, what will be the string read into the buffer? What will `read` return? Use this to assess how you will know to print an error and reprompt the player!
</details>
:::
### Socially Responsible Computing: Character Sets
The default string encoding in C, as you might recall from lectures and SRC Section #1, uses the ASCII standard, which represents each character as one byte. ASCII is the American Standard Code for Information Interchange. However, ASCII is only meant for English and it does not support accents or characters from non-Latin alphabets (for example, you cannot type the character ñ in a C@B override request).
To ensure that we are able to read in all player names that a user could input, and render them correctly, we will need to support a different character encoding. Programmers often turn to extended character sets (most commonly **Unicode**, and specifically its [UTF-8](https://www.cl.cam.ac.uk/~mgk25/unicode.html#utf-8) encoding) to create more inclusive applications. We covered Unicode in SRC Section #1, so feel free to refer to the [section slides](https://docs.google.com/presentation/d/1GbwBnwZZIek4sCWp3MDVjEEdSjhFBG3h7IOxN5MmLWA/edit?usp=sharing) for more information on what Unicode is and is not.
When programming for extended character sets, some of the standard library support functions for single character (ASCII) strings will not work as intended.
C provides support for multibyte characters through their `wchar_t` struct, which represents a character in 4 bytes. However, since many extended character sets have variable length characters (for example, UTF-8 encodes characters in 1-4 bytes), using `wchar_t` leads to wasted space in memory. Moreover, programs often receive UTF-8 text as input that isn't nicely laid out in 4-byte chunks, and must still be able to process it. (As an example, consider a website that processes input from a form: users may put strings like "γνωρίζω" or "❤️😺" into the form!)
UTF-8 characters follow a set byte format based on their length. 1 byte UTF-8 characters are meant to be compatible with ASCII, which means that they always begin with a 0 bit. For 2-4 byte UTF-8 characters, the number of leading 1s indicates the length of the character (in bytes). Each subsequent byte begins with the bits 10. You can find an overview of the format below:
| Length (bytes) | Encoding (binary) |
| ---------------------- | ----------------------------------------------------------------------- |
| 1 | `0xxxxxxx` |
| 2 | `110xxxxx 10xxxxxx` |
| 3 | `1110xxxx 10xxxxxx 10xxxxxx` |
| 4 | `11110xxx 10xxxxxx 10xxxxxx 10xxxxxx` |
### `mbslen()`
Now, to ensure that we are able to read in any name that a user could input, and render them correctly, we need to implement a function that will allow us to find the number of UTF-8 characters that a user inputs.
:::success
**Task:** Implement `mbslen()` in `mbstrings.c`.
:::
::::info
<details>
<summary><b>mbslen:</b> Counts the number of UTF-8 code points ("characters") in a UTF-8 encoded string.</summary>
<br />
**Synopsis:**
`mbslen` counts the number of code points in the UTF-8 multi-byte string stored in **bytes** until a null character is hit. Note that in this part of the assignment the number of "characters" does not correspond to the number of bytes, but to the number of valid UTF-8 code points; see the UTF-8 encoding table for more details.
```c
size_t mbslen(const char *bytes);
```
**Examples:**
```clike
char *emojis = "🥳😊😄";
size_t len = mbslen(emojis);
// len = 3
```
</details>
::::
::::info
<details>
<summary id="src"><b>Hint: </b>Remember bitwise operators?</summary>
<br />
While we already showed you `&`, `|`, and `^`, C supports several other bitwise operators as well. Here is a full rundown of operators you may find useful:
* `&` is AND, which puts a 1 bit in the result if both input numbers have a 1 in the same position, otherwise it puts 0. For example, 0b0110 & 0b1100 results in 0b0100.
* `|` is OR, which puts a 1 bit in the result if either one or both input numbers have a 1 in a position, otherwise it puts 0. For example, 0b0110 | 0b1100 results in 0b1110.
* `^` is XOR, which puts a 1 bit in the result if **exactly one** of the two input numbers has 1 in a specific position (but not if both do), otherwise it puts 0. For example, 0b0110 ^ 0b1100 results in 0b1010.
* `~` is binary negation, which flips all the bits in a number. For example, ~0b0111 results in 0b1000.
* `>>` shifts a binary number right by some number of places. For **unsigned** numbers, this means filling the top bits with zeros and dropping the bottom bits. For example, 0b0111 >> 2 results in 0b0001. For **signed** numbers, this means filling the top bits with the most significant bit, which you can learn more about [<ins>here</ins>](https://www.chipverify.com/digital-fundamentals/signed-unsigned-binary). For example, 0b0111 >> 2 results in 0b0001 and 0b1000 >> 2 results in 0b1110. This difference applies to all unsigned/signed types, including characters, since all values are stored as binary.
* `<<` shifts a binary number left by some number of places, filling the bottom bits with zeros and dropping the top bits. For example, 0b0111 << 2 results in 0b1100. This is consistent between signed and unsigned numbers.
We recommend casting to `unsigned char` for this assignment, specifically due to how the right shift operator differs between `signed` and `unsigned` numbers.
If you need examples on using bitwise operators in calculations, see <u>[this section](#bitwise)</u> in part 1!
</details>
::::
:::success
**Task:** Once you have successfully implemented `mbslen()`, call it in snake.c on the name the user inputs and store the result in the appropriate place.
:::
We're almost done! Let's tie it all together and present the game over screen.
:::success
**Task:** Edit `end_game(…)` and uncomment the lines around and including `render_game_over(…)` (which implicitly requires the name and its length) so that your snake game renders the final screen when the game is over.
:::
:::warning
**☑️ Testing Point G:** You should pass all the tests at this point! You should be able to prompt a user for their name, and then store their name and name's length (according to unicode characters), and see the final game over screen rendered when a game ends.
You should also ensure that your game is playable by running ```./snake 1```.
:::
### Reflecting on Unicode

::: success
**Task**: Read the text in the rest of this section as well as the excerpt of the Unicode Standard linked below (Sections 2.1 and 2.2), then write your answers to the three questions in this section.** Please write your answers to the following three questions in the SRC section of your `README`.
<br />
Please note that **you will need to consult a classmate for Question 3!** You will be given the opportunity to find a partner in your section. If you have special circumstances or encounter any difficulty, please contact us and we will match you with a classmate. Also, this [linked table](https://docs.google.com/document/d/1SaOhYPv52iHEiNDB0zsYQIT8-DDKhBvrGh7jmvfq2cg/edit?usp=sharing) from section is a resource that could be helpful to define the terms used in the rest of this assignment.
:::
The primary goal of the Unicode character encodings is to accurately represent "all characters in widespread use today." With that, the [Unicode Consortium](https://www.unicode.org/consortium/consort.html), the organization responsible for maintaining and updating the Unicode standard, must appropriately decide which characters to include.
<section>
**Q1.** Who founded the Consortium? Who is represented among the current members, and how might that affect decisions being made for Unicode?
</section>
Accounting for every possible language is difficult; the Unicode standard supports many, but not all.
<section>
**Q2.** Find a language that is not yet in Unicode, has only recently been supported (e.g., in the last 10 years), or is/was missing important characters. What is/was missing, and how does this affect the users of the language?
</section>
Beyond missing languages and characters in languages, Unicode has also faced controversies with representing and unifying the encodings of similar languages. One of the biggest controversies is [Han Unification](https://en.wikipedia.org/wiki/Han_unification) (which you should already be familar with from section), an attempt to unify the Chinese, Japanese, and Korean (CJK) languages into one common encoding.
The Ideographic Research Group (IRG) is responsible for creating and detailing the principles of Han Unification. The IRG is made up of experts from China, Japan, North and South Korea, Vietnam, and other regions that have historically used Chinese characters, as well as representatives from the Unicode Consortium. **Read sections 2.1 and 2.2** of **[this excerpt](https://www.unicode.org/versions/Unicode1.0.0/V2ch02.pdf)** of the Unicode Standard version 1.0 (feel free to skim the rest),explains some of the history and rationale of Han Unification. (Note that the IRG is the modern reincarnation of the CJK-JRG mentioned in the document).
This [Unicode Technical Note](https://www.unicode.org/notes/tn26/) explains why CJK scripts are unified, while Latin, Greek, and Cyrillic scripts aren’t. Meanwhile, [Suzanne Topping of IBM explains](https://web.archive.org/web/20131216023226/http://www.ibm.com/developerworks/library/u-secret.html) some of the downfalls of this decision:
>Fonts are the delivery mechanism for glyph display. This means that while Han characters have been unified, fonts can't be. In order to provide the glyph variations required to meet the needs of writing system differences, fonts must be specific to the system in use. Trying to use only one font guarantees that some characters won't look right to everyone.
For example, because of Han Unification, writing bilingual texts in multiple CJK languages can be difficult because it necessitates constantly shifting typefaces in order to display characters correctly. Topping also explores the social implications of Han Unification:
>Part of the objection to Han Unification is cultural. There is a perception that languages have been merged rather than just characters. This is an understandable confusion given that previous character sets and encoding methods have been language-specific. If the old character sets were merged and unified in Unicode, there is a feeling that the languages are somehow unified as well. East Asian cultures are unique and diverse, and would have valid objections if there were attempts made to somehow merge languages. While this is not the case, there is obviously some confusion about how unification works.
<section>
**Q3**. For this question, you will need to work with a classmate! Make sure to coordinate so that you outline **opposing positions** for Part A (e.g. if you outline the 'for' position, your partner defends the 'against' position). Then, come together and discuss in Part B!
- **Q3A**. Outline either the position for Han Unification, or the position against Han Unification. (1-2 paragraphs, note: this is individual work)
- **Q3B.** Have a discussion with your partner where you each advocate for your chosen position. In your response, note how your partner pushed back on your position and how you pushed back on your partner's position. What evidence did they provide? Which of their arguments challenged yours directly? Describe both partners' positions at the end of your conversation independent of each person's initial position in part A (it is okay if your position is neutral or if you are unsure, if that is the case then explain why).
To submit your response for this part, please include the following info in your README:
* Your partner’s CS login
* Your answer for Q3A
* A summary of your discussion for Q3B (include disagreements you had, ideas you may have had in common, convincing evidence you encountered, etc.)
* Feel free to represent this discussion however you think is most effective (bullet points, as a dialogue, standard written paragraph(s), etc.).
* This summary can be identical to your partner's.
</section>
#### You did it!! 😃 Go get some high scores (and post them on Ed) 🎮
# Extra Credit
If you're feeling adventurous, try to extend your game with some additional fun features! Make sure to gate your extra credit with a command line flag, special optional characters in board strings, or a `#define` so that existing tests don't break.
The amount of TA help you can get here may be limited. Please describe your implementation and how to test it in the "Extra Credit Attempted" section of your README.
_Extra credit is in no sense required to get an A, except if you’re a graduate student taking CSCI 1310, in which case we require you to achieve 3 extra credit points on this project._
**Extra credit's contribution to your grade is limited to 10 points. You're very welcome to attempt more, though, and impress us 😊.**
### Gameplay
#### Grow more than one length on each food
* You may find that some [online snake implementations](https://patorjk.com/games/snake/) have the snake grow more than one unit on each food. `#define` a constant that corresponds to the snake's growth length, and have the snake grow accordingly (**2 points**).
#### Sea snake! (Or C snake?) :ocean:
- Add a new type of cell to your board for water (similar to grass) and implement some logic for how your snake should behave in water. (Should your snake move faster or slower, or do something different? You decide!) (**3 points**)
#### Make a bot
* Create a simple bot that plays your game by moving the snake in random directions! (**3 points**).
* Go beyond the simple bot — make it do :sparkles: better :sparkles: (**3 points**).
#### Powerups!
* MULTISNAKE (**2 points for design, 4 for implementation**).
* Multi-speed snake? Support areas of the board (or items the snake can collect) that make it slower or faster. [Hint: recall that we use bit flags to represent cell state, so a cell could be in "slippery" state and change the snake speed when the snake is on it!] (**2 points**).
Set your creativity free with the following freestyle ideas! Figure out what they could mean and add support to the game. There is no right or wrong design here, just FUN 🥳!
* A snake that shrinks??? (**2 points**).
* Temporarily Incorporeal Snake? (**2 points**).
* Extra Life Snake? (**2 points**).
* Enemy snakes (**4 points**).
* Rainbow invincible snake (**2 points**).
#### Wraparound
* We currently do not define behavior when the snake hits the edge of the board (N.B.: the edge, **not** an outside wall). Make it so that the snake wraps around to the other edge when it runs off the board. (**4 points**)
### Visuals
These ideas will likely involve working with the renderer (`render.c`), which uses the `ncurses` and `ncursesw` libraries (for wide character support).
#### Better Snake visuals
* Rather than rendering "S" characters, make a solid green snake [Hint: use Unicode characters like we do for the walls] (**2 points**).
* Make the food look like food [Hint: Unicode food emojis] (**2 points**).
#### Bell character on food 🔔
* Read about [the "bell" character](https://en.wikipedia.org/wiki/Bell_character) (ASCII `0x7`, Unicode `U+0007`) and then add it to the game at relevant points (**2 points**).
#### Better UI
* Add a startup menu screen (**2 points**).
* Add a pause menu screen (**1 point**).
* Add a high score board! For this, you'll need to be able to run the game multiple times on one run of `snake.c`, and find a data structure to track high scores (**3 points**).
### Misc
#### Interesting Level Design
* Make a cool level and share it on EdStem (**0.1 points per heart received**).
* Make the coolest level as voted by your peers (**1 point, gold star and a round of applause**).
* Recreate a Brown building's floorplan as a level (**0.5 points**).
# Submitting your work
You will submit your work via git, using our grading server. In addition to your code, you will need to submit two components with some reflections: a README (submitted with your code).
### README file
When submitting your work, be sure to fill out the file `README.md` in your `snake` directory with the following info:
- **Design overview**: Any design decisions you feel are notable, or anything else you'd like your graders to know about your work
- **Collaborators**: any collaborators and citations for help that you received, CS 300 encourages collaboration, but we expect you to acknowledge help you received, as is standard academic practice.
- **SRC discussion from [this section](#Part-3B-Game-Over-display--learning-about-Unicode)**: Your answers to the SRC reflection questions under _"Responsible Computing Questions"_ (Q1, Q2, Q3A, and Q3B).
- **Extra credit (if any)**: Describe any extra credit you attempted, and any instructions we need to run it. You must describe any extra work here in order to receive credit.
### Submitting your code (and checking on the grading server)
Your submission will not be graded until you configure the **[grading server](http://cs300.cs.brown.edu/grade/s26)**. You should have used the grading server for Lab 0 already.
:::danger
If you were registered for CS 300 on the first day of classes, you should have received credentials by email.
If you only recently registered or you're shopping the course but haven't registered, you won't have an account yet. In that case, please complete [**this form**](https://forms.gle/W6zEsu3MapueycqAA) and wait until you receive your credentials. **We will create accounts based on the form entries at 8pm every day.**
:::
To submit your work, please do the following:
1. **Log into the grading server** with the password you received. Once you're logged in, enter your GitHub username (at the top).
2. **Connect your repository** by adding the repository URL under the "Project 1: Snake" category. Click "Project 1: Snake" to initiate a fetch of your repository from GitHub.
- *Note: If your GitHub account is not linked to your Brown email address, the grading server will give you a command to run to verify your project repository.*
3. **Run the tests**: On the "Project 1: Snake" page, use the buttons below the commit list to test your code in our grading environment. Make sure it still passes all the tests! If you run into issues, see [Testing](#Testing).
4. **Set your grading commit**: finally, press the **"grade this commit"** button to tell us which commit you want us to grade. Some notes about this:
- You can reassign your grading commit at any time before the 72 late hour cutoff. If your commit is after the deadline, the grading server will tell you how many late hours it uses after selecting it from the dropdown.
- In rare cases, you may want to tell us about an older commit that is *not* your grading commit. For example, perhaps you got all of part 2 working, but you ran into issues on part 3 that broke some of the tests in part 2, which you couldn't fix. In a situation like this, please mark your latest commit (i.e., the best one for part 3) with "grade this commit", and then use the "flag this commit" button to flag your best commit for part 2. We'll look at both commits and may be able to give partial credit.
5. **Code Discussion**: After submitting your work, you may be asked to do a code discussion with one of the staff members, which is a chance for you to get feedback on your design, code, and deubgging process.
Congratulations, you've completed the first project! :clap:
## Grading breakdown
* **15% (15 points)** answers to Socially Responsible Computing questions.
* **5% (5 points)** completed README.
* **80% (80 points)** tested functionality.
* Each test is weighted equally: 1.40 points per test, and 0.2 points for passing them all
* Note that even if you pass every test, you will lose points if your game isn't playable by running your `snake` program manually.
* **Extra Credit** will be worth up to 10 additional points. _Students in CSCI 1310 must complete at least 3 points of extra credit._
# Testing
:::warning
**⚠️ Make sure that you run all tests inside the container!**
:::
:::success
**Tip**: For more guided tutorials about running the tests and how to debug them, see our **[Testing and Debugging Guide](https://csci0300.github.io/assign/projects/project1-testing.html)**!
:::
We've provided an automated test suite to check your work. As you progress through the project, you will pass more and more of the tests until you pass them all!
To run all the tests, you can use
```bash
$ make check
```
To run a specific test you can use
```bash
$ make check-<n>
```
For instance `make check-5` to run test 5. To run a range of tests, use
```bash
$ make check-<n>-<m>
```
For instance, `make check-3-10`.
After passing the tests locally, you should make sure that:
- Make sure your tests pass on the grading server by clicking the "Run tests" button. Tests that pass on your system but fail on the grading server (or vice versa) are a sign your program is relying on some undefined behavior, which you should fix!
- Make sure the same is playable by running your `./snake` binary manually. We will deduct points for implementations that pass all the tests, but are not playable. If you are passing the tests but your game isn't playable, check [here](https://csci0300.github.io/assign/projects/project1-testing.html#How-the-autograder-works).
### How the tests work
Each test contains a compressed board string, a random seed that determines the order of food generation, a flag that says whether or not the snake should grow, and a series of keyboard inputs. The autograder will use those inputs to pretend to play your snake game, for as many steps as there are inputs. When the inputs run out, the autograder takes a snapshot of your game data and compares it against an expected output, notifying you of any discrepancies.
**You can view the list of inputs and outputs for each test** in the file `test/traces.json` in your repository. See [this section](https://csci0300.github.io/assign/projects/project1-testing.html#How-the-autograder-works) for more info about the autograder, and how to interpret this file.
### Verbose mode
By default, if your board doesn't match the expected output the autograder will print your board and the expected board so you can see the errors. If you also want to see all the intermediate boards as the autograder plays snake, you can run in verbose mode:
```bash
$ make -B check V=1 # `-B` forces a rebuild and `V=1` sets verbose mode
```
To switch back to normal output, you can use
```bash
$ make -B check V=0
```
# Debugging
> *Useful background*: For more background info on debugging and **the address sanitizer** see our [C primer on debugging](https://csci0300.github.io/assets/c-primer3.html).
This section has been moved to our **[testing and debugging guide](https://csci0300.github.io/assign/projects/project1-testing.html)**. Please look here for more info!
---
<small>_Acknowledgements:_ This project was developed for CS 300 by Benjamin Lee, Casey Nelson, Livia Zhu, Rhea Goyal, Sreshtaa Rajesh, Paul Biberstein, Richard Tang, Sophia Liu, Vic (Shihang) Li, and Malte Schwarzkopf.</small>